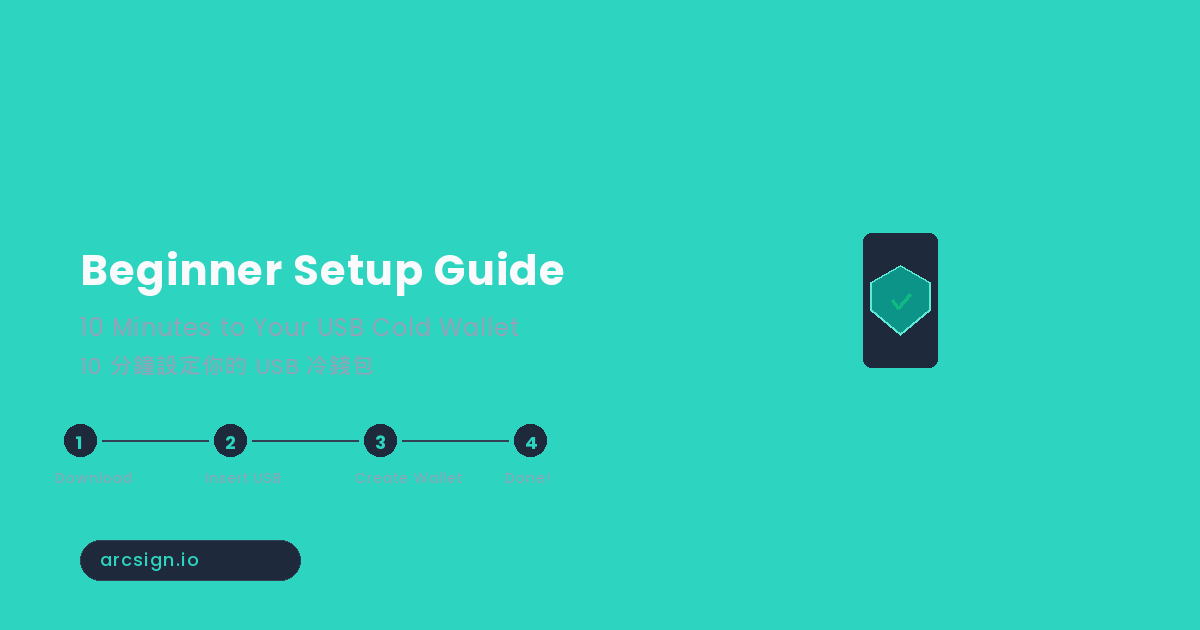
ArcSign Beginner Guide: Set Up Your USB Cold Wallet in 10 Minutes
- Why You Need a USB Cold Wallet
- Before You Start: What You Need
- Step 1: Download and Install ArcSign
- Step 2: Set Up a Provider (Blockchain Data Source)
- Step 3: Insert Your USB Drive
- Step 4: Create Your First Wallet
- Step 5: Back Up Your Wallet (Critical!)
- Step 6: Basic Operations — Receive and Send
- What Protects Your Wallet?
- Common Questions and Tips for Beginners
- FAQ
Why You Need a USB Cold Wallet
If you hold cryptocurrency — regardless of the amount — security should be your top priority. Exchange hacks and hot wallet thefts make headlines regularly, and the solution is remarkably simple: keep your private keys offline. This is the core concept behind "cold storage."
Traditional cold storage solutions require purchasing dedicated hardware wallets costing $79 to $150. But in 2026, you don't need to spend that money. ArcSign lets you turn any USB flash drive into a cold storage solution with security that rivals hardware wallets — and it's completely free.
This tutorial will walk you through the entire process, from downloading ArcSign to making your first transaction. No technical background is required — just a USB drive and 10 minutes of your time.
Zero Cost: Software is completely free; use any USB drive. Cold Storage Security: XOR 3-shard encryption + AES-256 + mlock memory protection. Multi-Chain Support: Manage Ethereum, BSC, Polygon, and more from one wallet. Open Source Plans: All source code will be made public once the user base reaches 10,000, enabling full community audit.
Before You Start: What You Need
Setting up ArcSign requires just three things:
| Item | Requirements | Recommendation |
|---|---|---|
| Computer | Windows 10+ or macOS 12+ | Desktop or laptop |
| USB Flash Drive | Any brand, 1GB+ capacity | New or freshly formatted recommended |
| Backup USB (Optional) | For storing ArcSign encrypted wallet backup | Safer and more convenient than pen & paper |
Traditional cold wallets require you to write down seed phrases on paper — paper can be lost, water-damaged, stolen, and it can't be encrypted. ArcSign offers a better solution: one-click encrypted wallet backup files. Save them to a second USB or offline storage device. Backup files are protected by AES-256 encryption and XOR shard technology — even if someone gets the file, they can't crack it. To restore, simply import the backup + enter your password — safer, easier, and more reliable than pen & paper.
Step 1: Download and Install ArcSign
Visit the official ArcSign website at arcsign.io and click the "Free Download" button. The site automatically detects your operating system and provides the right installer: .msi for Windows users, .dmg for macOS users.
Once downloaded, double-click the installer to begin. The process is identical to installing any other application — just follow the prompts and click "Next." Installation typically completes within 30 seconds.
After installation, launch ArcSign. You'll see a welcome screen. Before creating a wallet, we need to set up a blockchain data provider — this is what allows ArcSign to query on-chain assets.
Step 2: Set Up a Provider (Blockchain Data Source)
ArcSign is a cold wallet — your private keys stay offline on your USB. But to display your asset balances, transaction history, and other on-chain information, ArcSign needs to query the blockchain through a Provider (like Alchemy). Think of it like your phone needing Wi-Fi to check email — the Provider only "reads" public on-chain data. Your private keys are never transmitted.
Get a Free Alchemy API Key
- Visit alchemy.com and sign up for a free account
- In the Alchemy Dashboard, create a new App (select the blockchain network you want to use, e.g., Ethereum Mainnet)
- Once created, find the API Key on the App details page and click to copy it
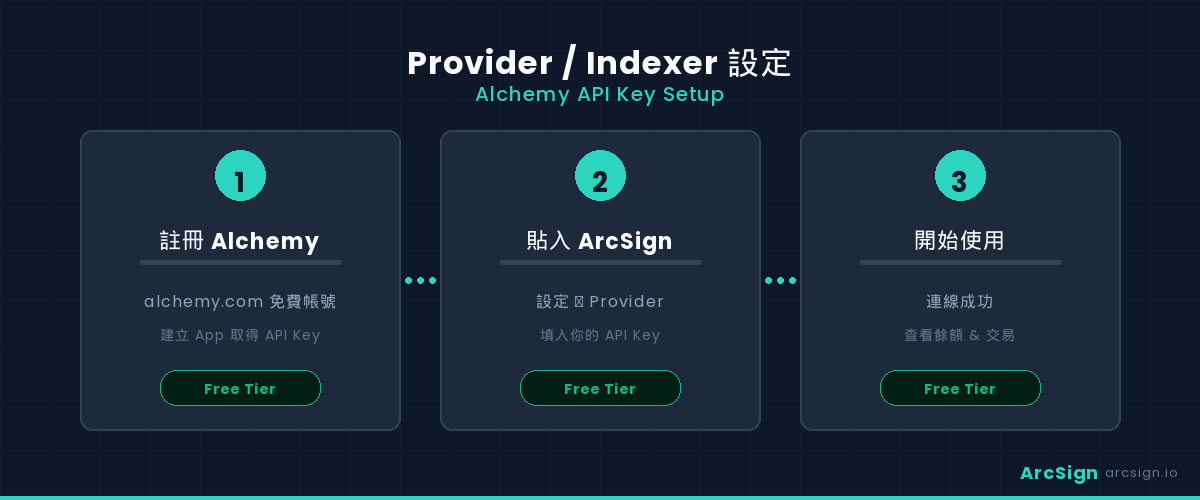
Configure Provider in ArcSign
- In the ArcSign welcome screen or Settings page, find "Provider Settings" or "RPC Node Configuration"
- Select the blockchain network you want to configure (Ethereum, BSC, Polygon, etc.)
- Paste the Alchemy API Key you just copied into the corresponding field
- Click "Test Connection" to confirm it works, then click "Save"
If you plan to use multiple blockchains (e.g., Ethereum and BSC simultaneously), you can create separate Apps in Alchemy for each chain and get individual API Keys. Alchemy's free plan provides generous monthly request quotas — more than enough for personal use.
Once your Provider is configured, ArcSign can display your on-chain assets in real time. This setup only needs to be done once — ArcSign will automatically connect on every subsequent launch.
Step 3: Insert Your USB Drive
Insert your USB flash drive into your computer's USB port. ArcSign will automatically detect the USB device and display its information (brand, capacity, etc.) within the application.
If ArcSign doesn't detect your USB right away, don't worry. Try unplugging and reinserting the drive, or switching to a different USB port. Detection typically completes within 3-5 seconds.
Your USB drive doesn't need to be anything special. Any commercially available flash drive with 1GB+ capacity will work. However, if you plan to use it long-term, choose a reliable brand (like Samsung or SanDisk) for better data durability. Consider preparing a second USB as a backup.
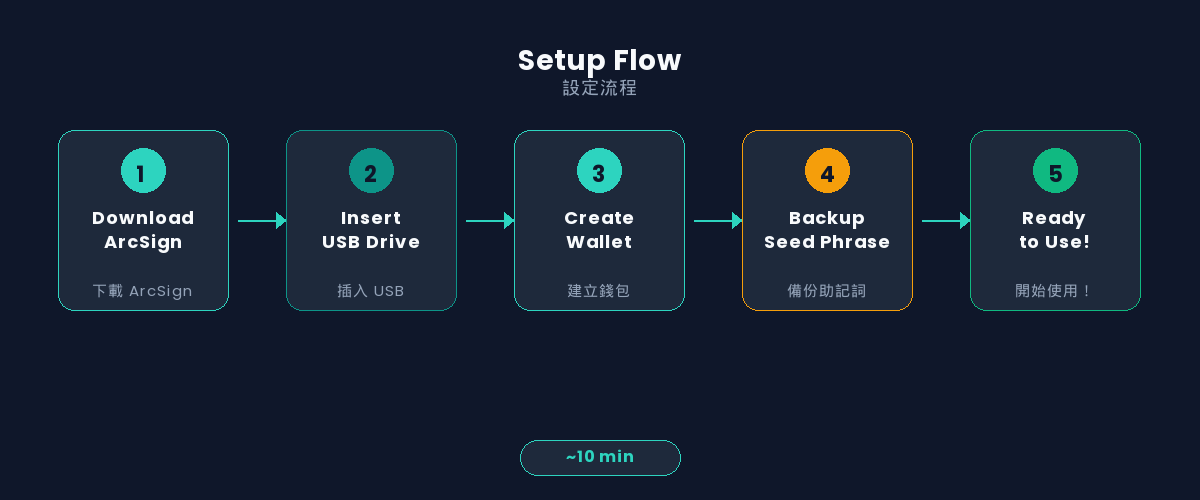
Step 4: Create Your First Wallet
Once your USB is detected, ArcSign will guide you through the wallet creation process. First, you'll set a wallet password. This password is used for daily login and transaction confirmation — choose a strong one (12+ characters with uppercase, lowercase, numbers, and special characters).
After setting your password, ArcSign will automatically generate a 12-word seed phrase using the BIP-39 standard. These 12 English words are the root key of your entire wallet — from this seed phrase, wallet addresses for all supported blockchains can be derived. This is called an HD Wallet (Hierarchical Deterministic Wallet), using the BIP-44 specification for multi-chain key derivation.
During creation, ArcSign uses XOR 3-shard technology to split your private key into three encrypted fragments. Each fragment alone is meaningless random data — they only combine briefly when you need to sign a transaction. This means even if someone gets your USB, they cannot recover your private key without the correct password.
Step 5: Back Up Your Wallet (Critical!)
If your USB is lost, damaged, or stolen, your backup is the only way to recover your wallet and assets. Please take this step seriously.
The Problem with Traditional Methods: Pen & Paper
Most cold wallet guides tell you: "Get a piece of paper, write down your 12 seed words, and put it in a safe." Sounds simple, but this method has serious flaws:
- Paper is fragile — vulnerable to water, fire, fading, and even pets
- No encryption — anyone who sees the paper can steal all your assets
- Hard to back up safely — every additional copy is another point of exposure
- Error-prone — handwriting 12 English words has a non-trivial error rate; one wrong letter could mean you can never recover
ArcSign's Solution: Encrypted Wallet Backup Files
ArcSign offers a modern, more secure alternative — one-click encrypted wallet backup files. Here's how it works:
- Go to ArcSign Settings and select "Export Encrypted Backup"
- The system generates an AES-256 encrypted
.arcsignbackup file - Copy this backup file to your second USB drive or other offline storage
- Done! Your backup is protected by military-grade encryption
| Paper Seed Phrase | ArcSign Encrypted Backup | |
|---|---|---|
| Anti-theft | ❌ Anyone can read it | ✅ AES-256 encrypted |
| Durability | ❌ Water, fire, fading | ✅ Digital file, multiple copies |
| Accuracy | ❌ Handwriting errors | ✅ Exact digital copy |
| Recovery speed | 🐢 Type words one by one | ⚡ One-click import |
| Making copies | ⚠️ Each copy = more risk | ✅ Copy file with zero risk |
Of course, ArcSign still displays your 12-word seed phrase during wallet creation — you can optionally write it down as a last resort. But we strongly recommend using the encrypted backup file as your primary backup method — it's safer, easier, and less error-prone.
Key principles for backup file storage:
- Store on offline devices — a second USB, external hard drive; never cloud storage
- Make multiple copies — store in different physical locations; encrypted backups can be safely copied
- Remember your wallet password — you'll need it to decrypt the backup file during restoration
- Never share your backup file — even though it's encrypted, never give it to anyone
Step 6: Basic Operations — Receive and Send
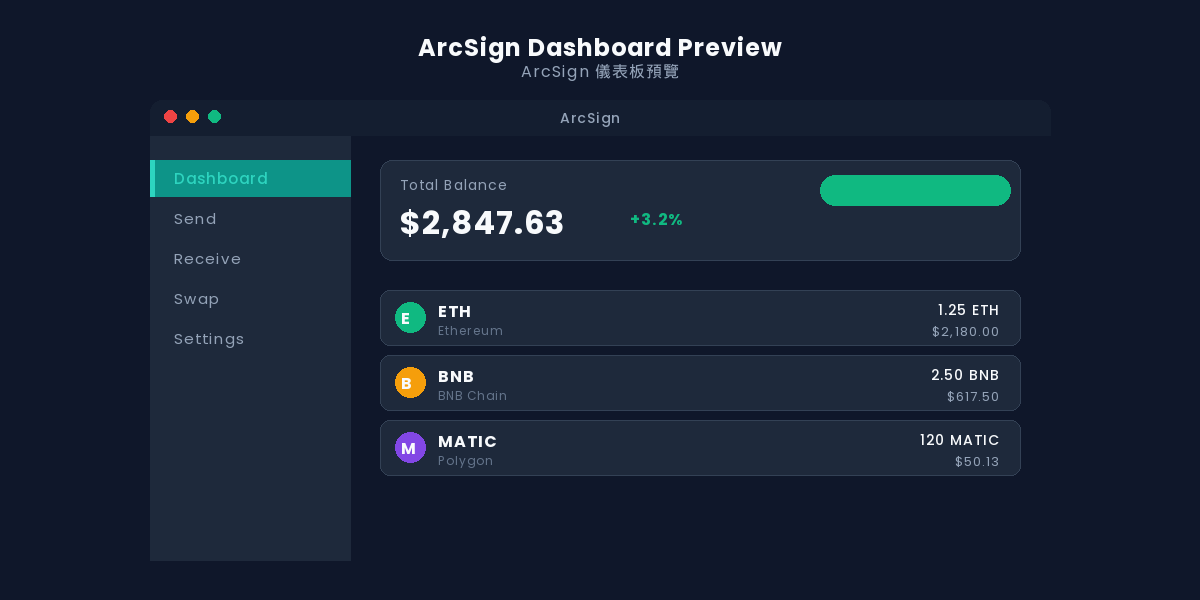
Congratulations! Your USB cold wallet is now set up. Let's explore ArcSign's basic operations.
Receive
Click the "Receive" button on the dashboard. ArcSign will display your wallet address and a corresponding QR code. Share this address with anyone who wants to send crypto to you, or paste it on an exchange's withdrawal page. ArcSign supports Ethereum, BSC, Polygon, and more — switch networks to get the receiving address for different chains.
Send
Click the "Send" button, enter the recipient's address and amount, confirm the gas fee, then enter your wallet password to sign the transaction. The entire signing process happens locally on your computer — the private key is briefly restored in mlock-protected memory (only 1-5 milliseconds), then immediately destroyed after signing. Your private key never leaves your device.
DApp Connection (WalletConnect)
ArcSign has built-in WalletConnect support, letting you connect to decentralized applications (DApps) including DEXes, NFT marketplaces, and DeFi protocols. Simply choose WalletConnect on the DApp website, then scan the QR code or paste the connection string. For a detailed walkthrough, check out our upcoming WalletConnect Tutorial.
What Protects Your Wallet?
You might be wondering: how can a regular USB flash drive securely store crypto assets? The answer lies in ArcSign's three-layer security architecture.
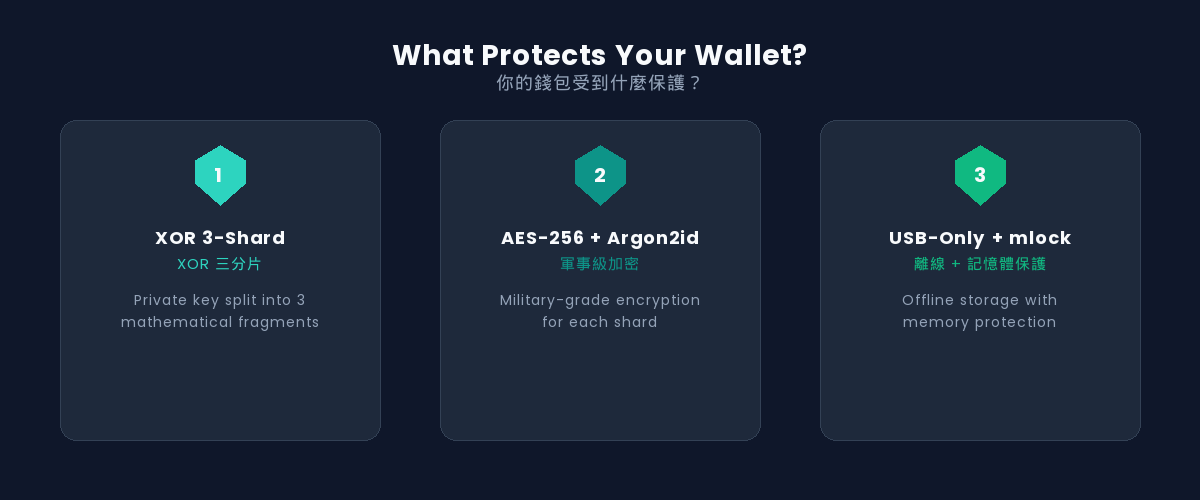
Layer 1: XOR 3-Shard Key Protection
Your private key is never stored directly on the USB. ArcSign uses XOR operations to split the key into three independent encrypted fragments. Even if someone obtains your USB and breaks through the file system, they'll only find three pieces of meaningless random data. The fragments only combine briefly in memory when you enter the correct password.
Layer 2: AES-256-GCM + Argon2id Encryption
Each key fragment is additionally protected by AES-256-GCM encryption, paired with the Argon2id key derivation function. This is widely recognized as one of the strongest encryption combinations available, used extensively in military and financial applications. Brute-forcing AES-256 is computationally infeasible with current technology.
Layer 3: mlock Memory Protection + USB-Only Storage
When you need to sign a transaction, the private key is briefly restored in mlock-protected memory (1-5 milliseconds). mlock prevents the operating system from swapping this memory to disk, ensuring sensitive data isn't unknowingly written to permanent storage. After signing, the memory is immediately zeroed out. Combined with all data residing exclusively on the USB, nothing remains on your computer after you unplug.
Even assuming an attacker has full access to your USB drive, without your password they face XOR sharding + AES-256 dual-layer encryption. To crack this combination, even the world's most powerful supercomputer would need a time far exceeding the age of the universe. Your private keys are safe.
Common Questions and Tips for Beginners
What happens to my wallet after I unplug the USB?
That's the beauty of cold storage! When the USB is unplugged, your private keys go completely offline. Your assets remain safely on the blockchain — you just can't make transactions temporarily. When you need to transact, simply reinsert the USB, launch ArcSign, and enter your password.
Can I use the same USB on multiple computers?
Yes. Just install ArcSign on another computer and plug in your USB. All wallet data is stored on the USB, not tied to any specific machine. However, only use trusted computers — avoid public computers or devices that might have keyloggers installed.
What if my USB drive breaks?
This is where ArcSign's encrypted backup files shine. Simply import your backup file onto a new USB and enter your password — your entire wallet is restored instantly, no need to type seed words one by one. We recommend keeping a backup USB with a full copy using ArcSign's "Export Encrypted Backup" feature. If you also have a handwritten seed phrase, that works as a fallback too.
Is ArcSign open source?
ArcSign is not yet open source, but all source code will be made public once the user base reaches 10,000. Open sourcing is a key milestone on our roadmap, and when it happens, every line of code will be open to audit by the global developer community. In the meantime, ArcSign's security architecture (XOR sharding, AES-256, mlock) is built on industry-standard cryptographic primitives that you can verify in any textbook.
FAQ
Which blockchains does ArcSign support?
Currently supports Ethereum, BNB Chain (BSC), Polygon, and other EVM-compatible chains, as well as Bitcoin. More chains will be added over time.
Does it cost anything?
The ArcSign desktop application is completely free. Premium features (like Pro NFT Membership) are optional and don't affect core security functionality.
How is ArcSign different from MetaMask?
MetaMask is a hot wallet — your private keys stay in the browser, always connected to the internet. ArcSign is a cold storage solution — keys live on an offline USB drive. In terms of security, cold storage is far superior because it fundamentally eliminates the possibility of remote attacks.
What if I forget my password?
You can use your seed phrase to restore your wallet and set a new password. This is why safely storing your seed phrase is so critical.
Can I manage multiple wallets?
Yes. ArcSign's HD wallet architecture supports deriving multiple accounts from a single seed phrase, allowing you to create different wallet addresses for different purposes.
Ready to Get Started?
Download ArcSign and you'll have a free USB cold wallet in 10 minutes.
Download ArcSign Free